1Before you start
Golden Inventory runs in your web browser. You do not install anything. It works on a computer, a tablet and a phone.
Words you will see
| Word | What it means |
|---|---|
| Item (product) | A thing you buy, keep on a shelf and sell. Each item has a code, for example LAP-14. |
| Vendor | The company that sells goods to you (your supplier). |
| Customer | The person or company that buys goods from you. |
| Location | The place where you keep stock, for example your warehouse Main. |
| Document | A form that records one action: an order, a receipt, an invoice. |
| Draft | A document that you can still change. A draft does not change stock or money. |
| Approved | A final document. When you approve a receipt, an invoice or a sales receipt, the stock changes. |
| On hand | The quantity that is on your shelves now. |
How the documents connect
Buy
Sell on account
Sell at the counter
You do not type a document two times. One button turns a purchase order into an item receipt, and a sales order into an invoice.
What the Free plan gives you
All steps in this manual work on the Free plan. When your business grows, open Settings → Billing & import, select Monthly or Yearly and click Buy on a plan. You pay on Gumroad, and the new plan shows when you come back. Your data stays.
2Create your account and company
You do this one time.
- Go to inventory-system.com and click Start free.
- Click Create account. Enter your email and a password. You can also sign in with Google.
- Open the email that we send to you and confirm your account. Then sign in.
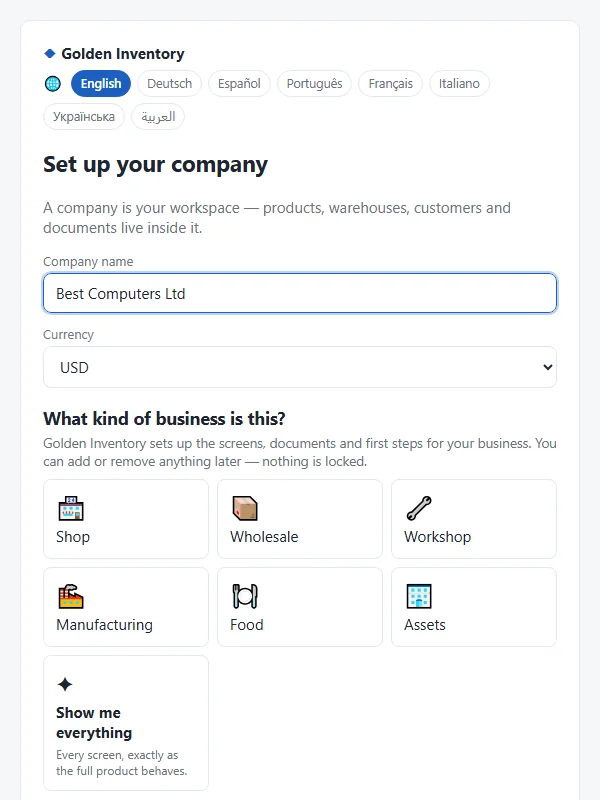
- In Set up your company, type your company name and select your currency.
- Select the kind of business that is nearest to yours, for example Wholesale or Shop. Then select your country. The app sets the correct tax rates and menus.
- Click Finish setup, then Start using it.
3The main screen
After you sign in, you see the Dashboard.
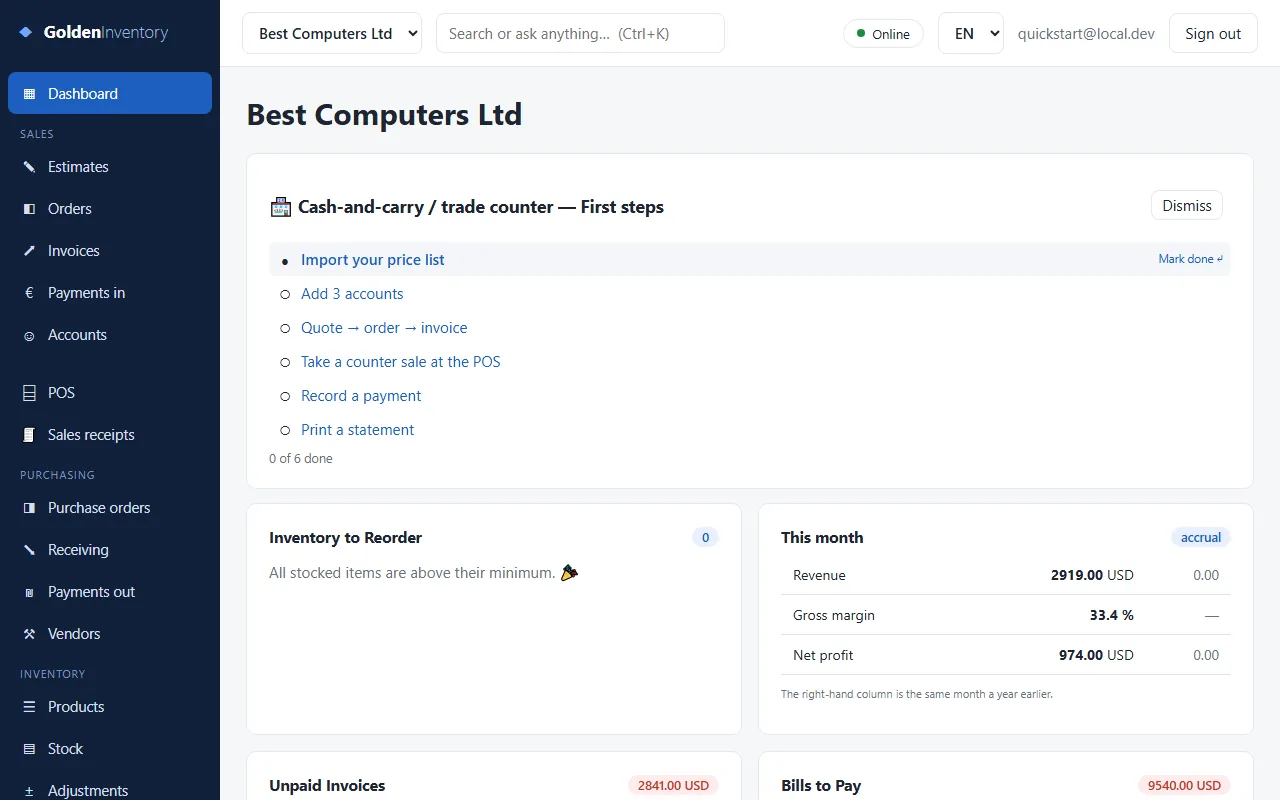
- Left menu. Groups: Sales (estimates, orders, invoices, payments in, customers), POS, Purchasing (purchase orders, receiving, payments out, vendors) and Inventory (products, stock, adjustments, stock counts).
- Menu names change a little with the business type. For example, you can see Products or Items, Accounts or Customers, Orders or Sales orders. They are the same functions.
- Search at the top. Type an item code, a customer name or a document number.
- First steps. A short list of tasks for your business type. Click a line to go there.
- Inventory to Reorder. Items that are below their minimum quantity.
- Online shows that your data is saved on the server. If the internet stops, you can continue work. The app sends your changes when the connection comes back.
4Add your products
Put each product into the app one time. After that, you only select it.
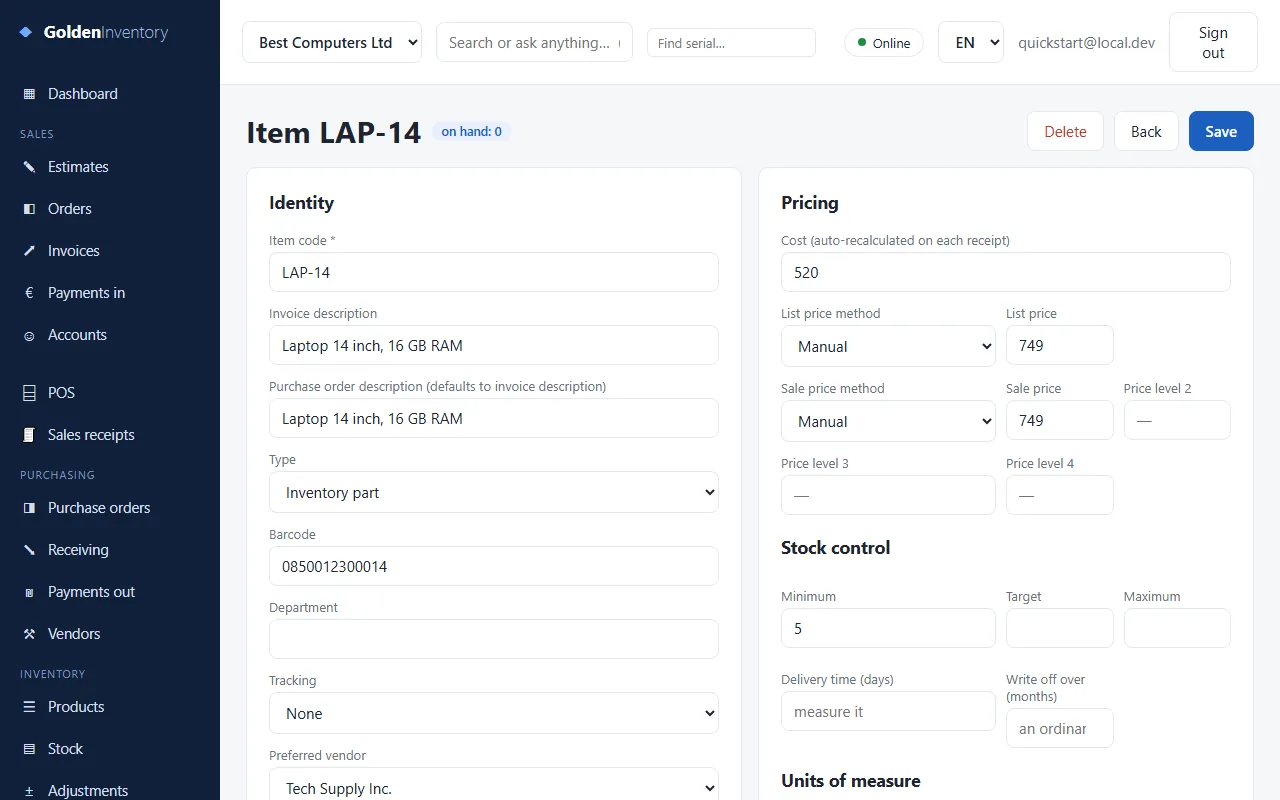
- In the left menu, click Products, then + New item.
- Item code — a short unique code, for example LAP-14. This field is necessary.
- Invoice description — the name that customers see.
- Barcode — scan the label with your barcode scanner, or type the number.
- Cost — the price you pay. Sale price — the price you sell at.
- Minimum — when the stock falls below this number, the item shows in Inventory to Reorder.
- Preferred vendor — the supplier you usually buy this item from.
- Click Save.
5Add vendors and customers
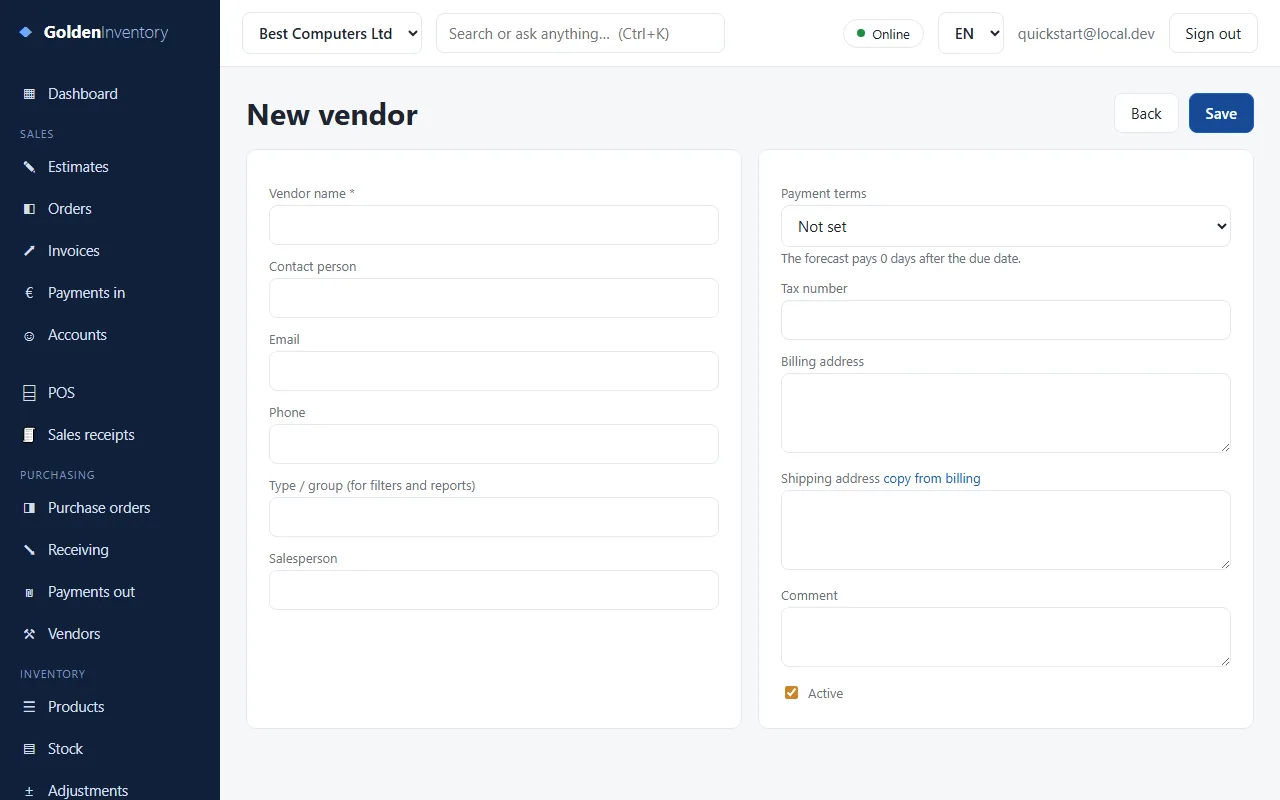
- Click Vendors in the left menu, then + New vendor.
- Type the Vendor name. Add the contact person, email, phone and billing address.
- Select the Payment terms if you know them, for example Net 30.
- Click Save.
To add a customer, click Accounts in the Sales group, then + New customer, and do the same steps. Every document uses the address you enter here, so you do not type it again.
6Enter your opening stock
You have goods on the shelves now. Tell the app how many. You do this one time, before the first sale.
- Click Receiving, then + New.
- Keep the Vendor field empty. The app shows — none (initial stock) —.
- Make sure that Location is your warehouse.
- Add one line for each item: select the item (or scan its barcode), type the quantity that you counted and the cost.
- Click Save & approve.
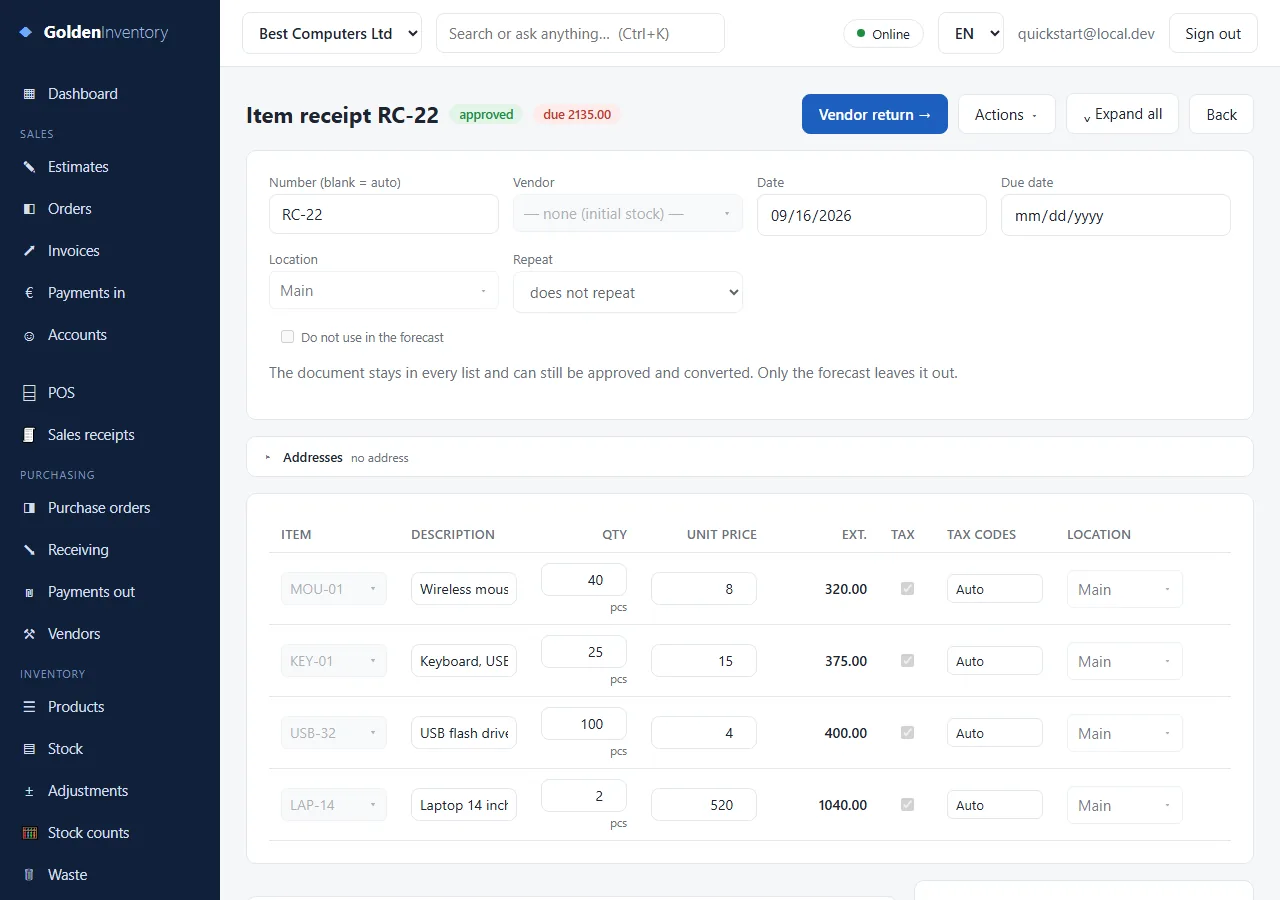
Now open Stock. The On hand column shows your quantities.
7Order goods: the Purchase Order
A purchase order (PO) tells your vendor what you want to buy. It does not change your stock.
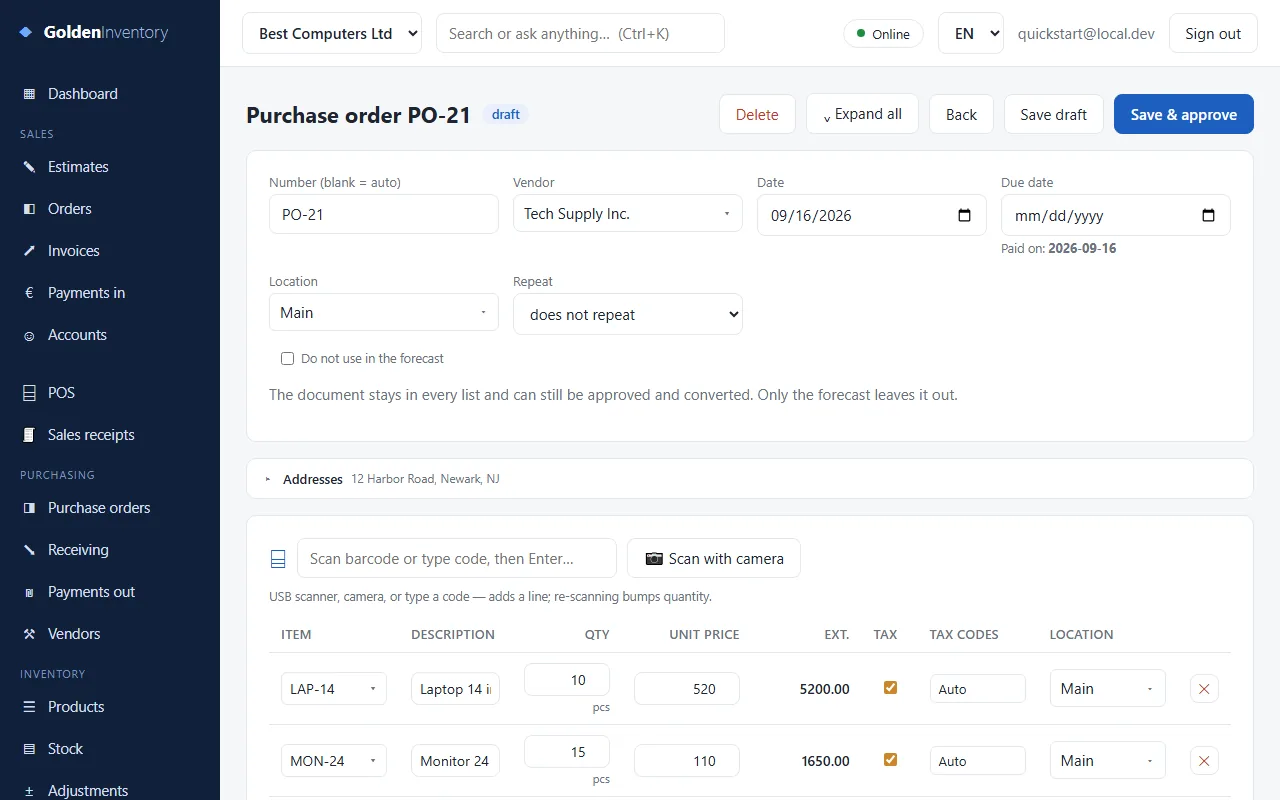
- Click Purchase orders, then + New.
- Select the Vendor. The address fills in automatically.
- Add the items. Use one of three ways:
- click the Item field and select from the list;
- type the item code;
- scan the barcode into Scan barcode or type code. Scan again to add one more.
- Check the Qty and Unit price on each line.
- Click Save & approve.
Send the order to your vendor
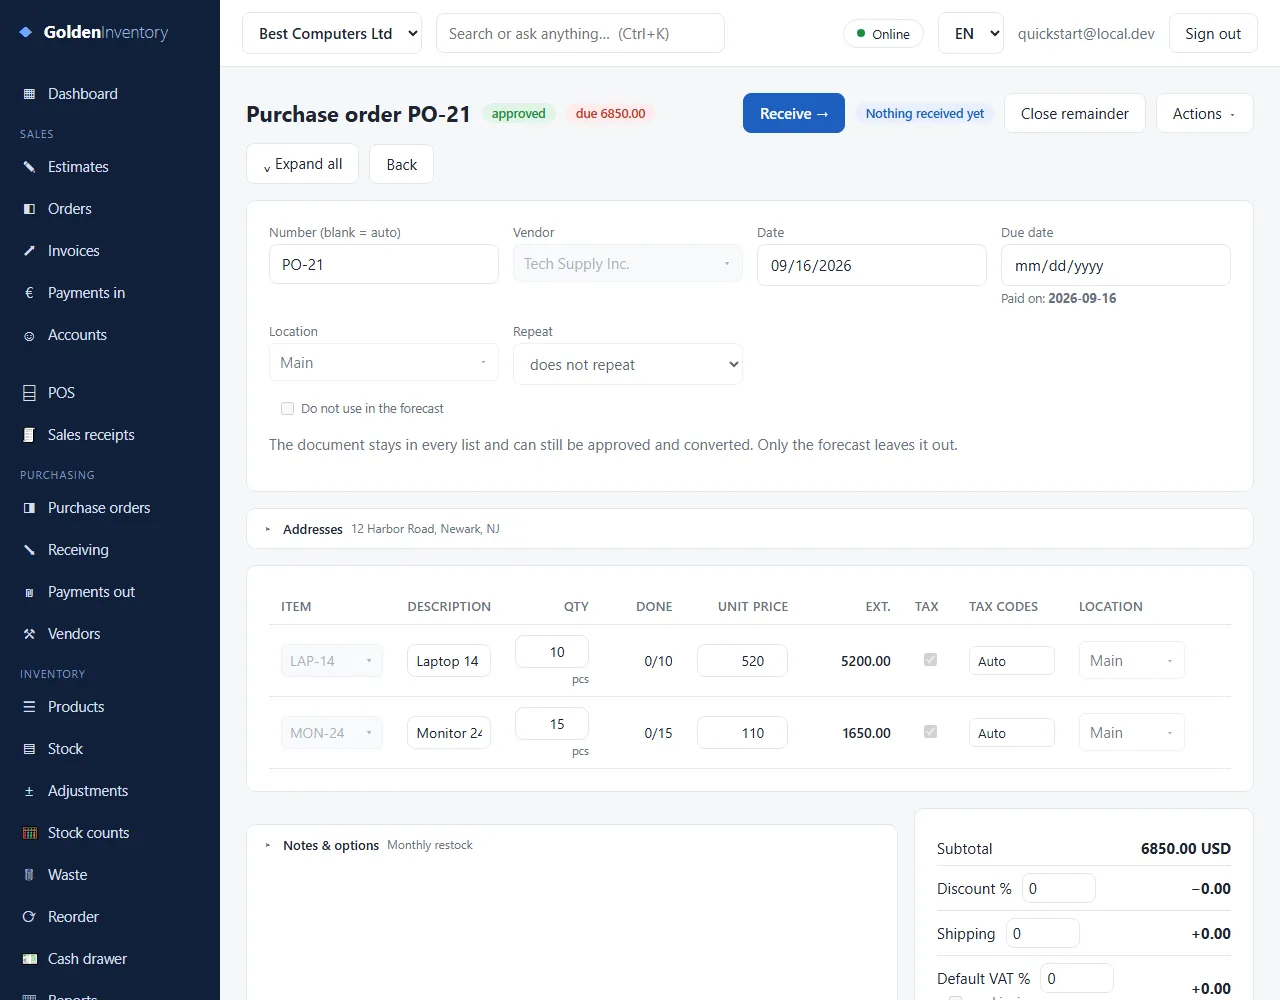
Open the approved PO and click Actions. Select Print, PDF or Email.
8Receive goods: the Item Receipt
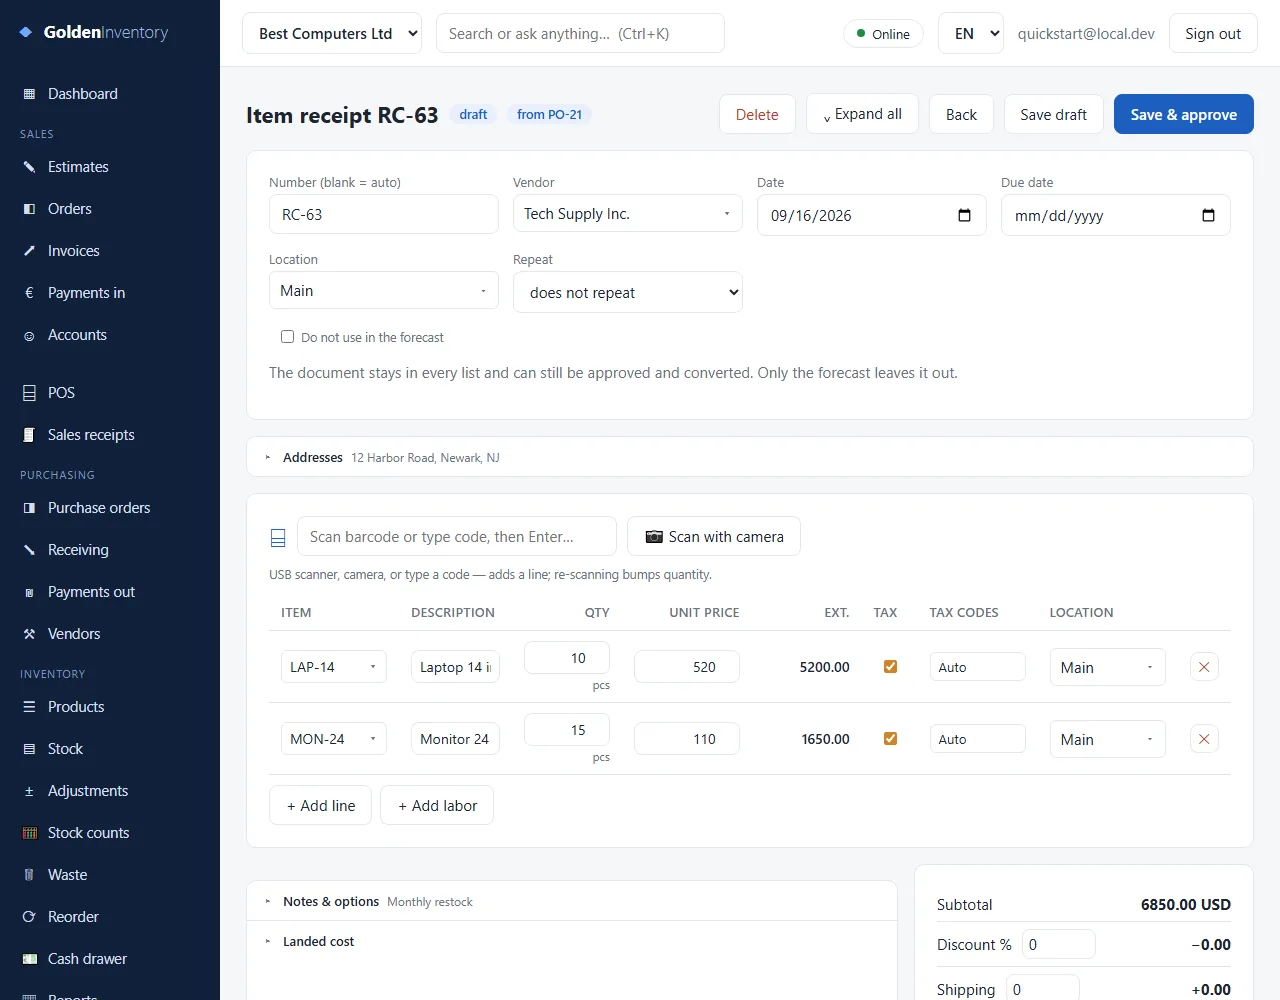
The truck arrives. Record what you really received. This step puts the goods into stock.
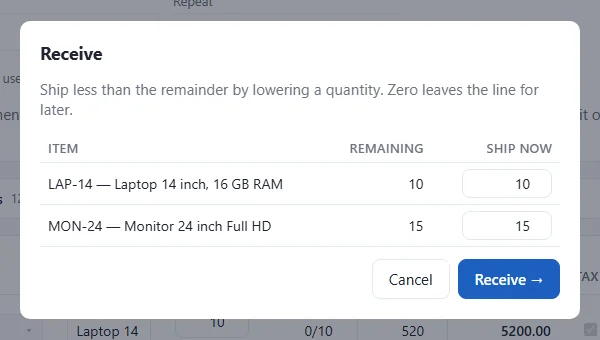
- Open the purchase order and click Receive →.
- A window shows each item. If a quantity is missing, type the quantity that you received. Type 0 for an item that did not come.
- Click Receive →. The app makes a draft item receipt with all lines filled.
- Count the goods and compare with the lines. Change the quantity or the price if necessary.
- Click Save & approve. The stock goes up.
9Take a customer order: the Sales Order
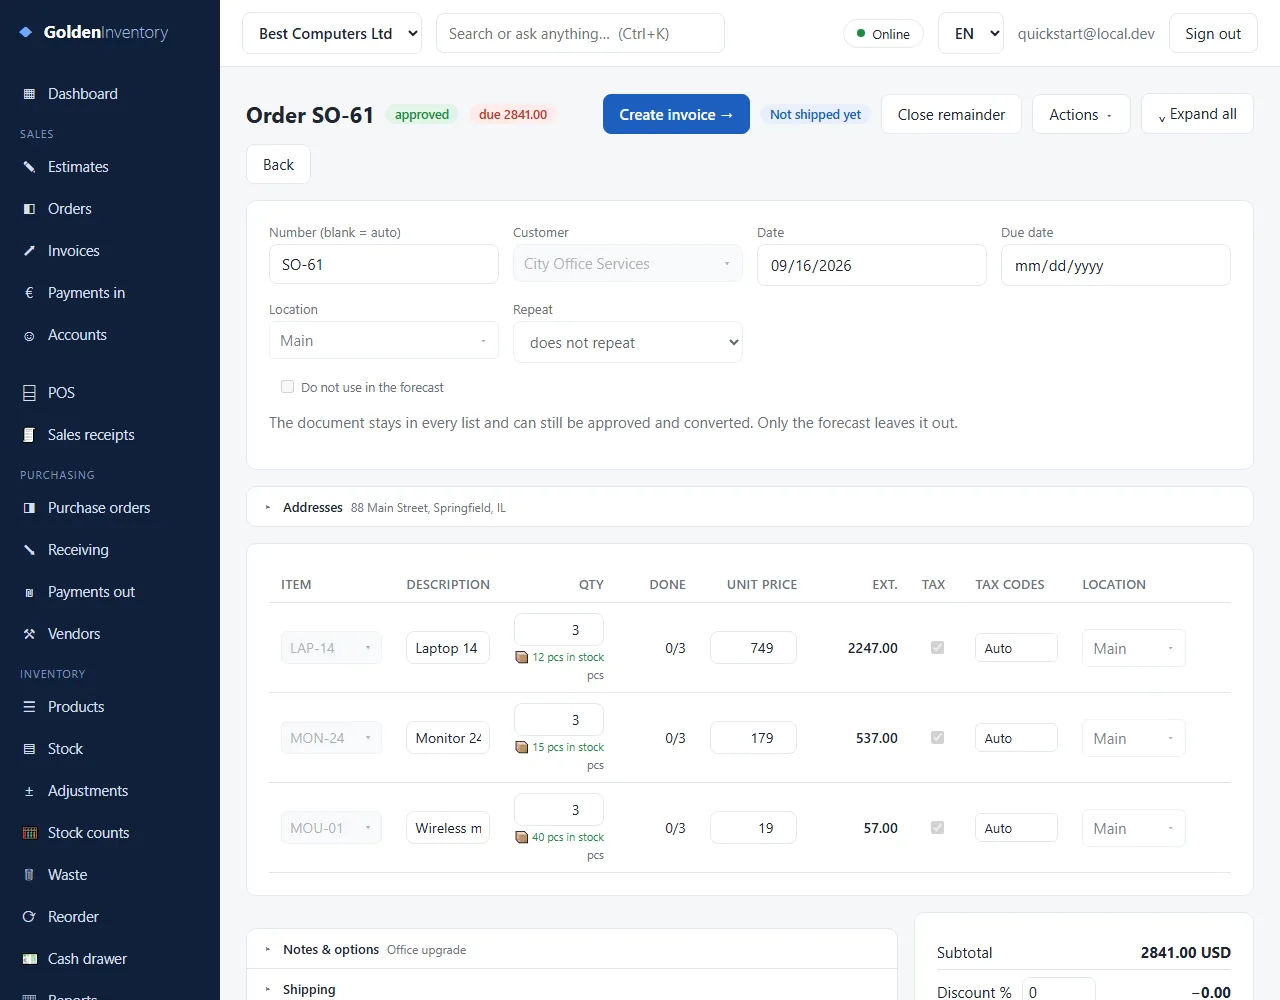
A sales order records what the customer wants. It does not change the on-hand quantity. Use it when you ship later or wait for payment.
- Click Orders in the Sales group, then + New.
- Select the Customer.
- Add the items (list, code or barcode). Under each quantity, the app shows pcs in stock. Green means that you have enough.
- Check the prices. Add a discount or shipping at the bottom if necessary.
- Click Save & approve.
10Ship and bill: the Invoice
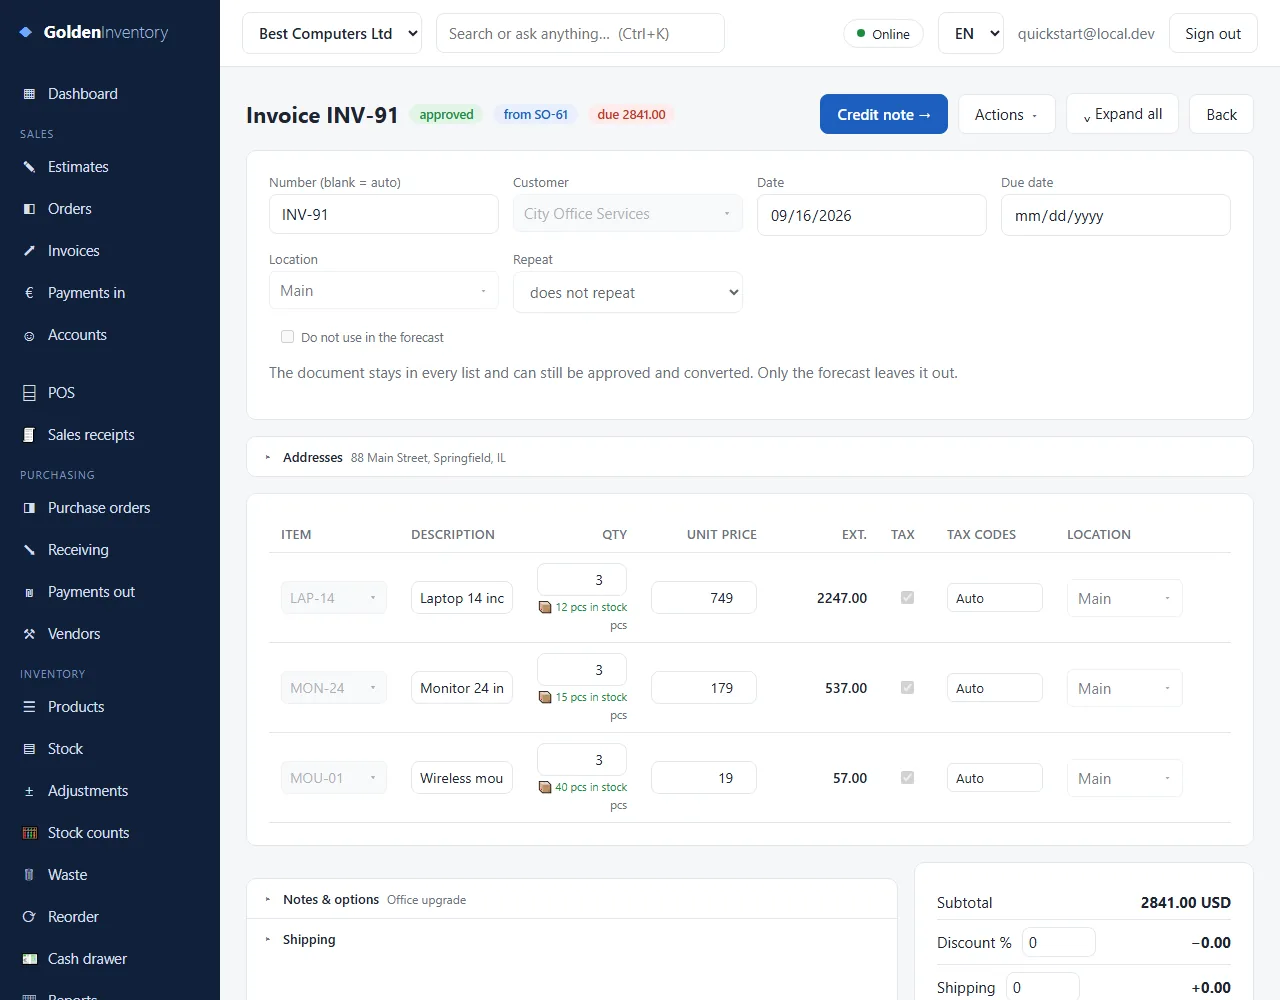
The invoice is the bill for the customer. When you approve it, the goods leave your stock.
- Open the sales order and click Create invoice →.
- In the window, lower a quantity if you ship only part of the order. Click the button to continue.
- Check quantities, prices and the location.
- Click Save & approve. The stock goes down.
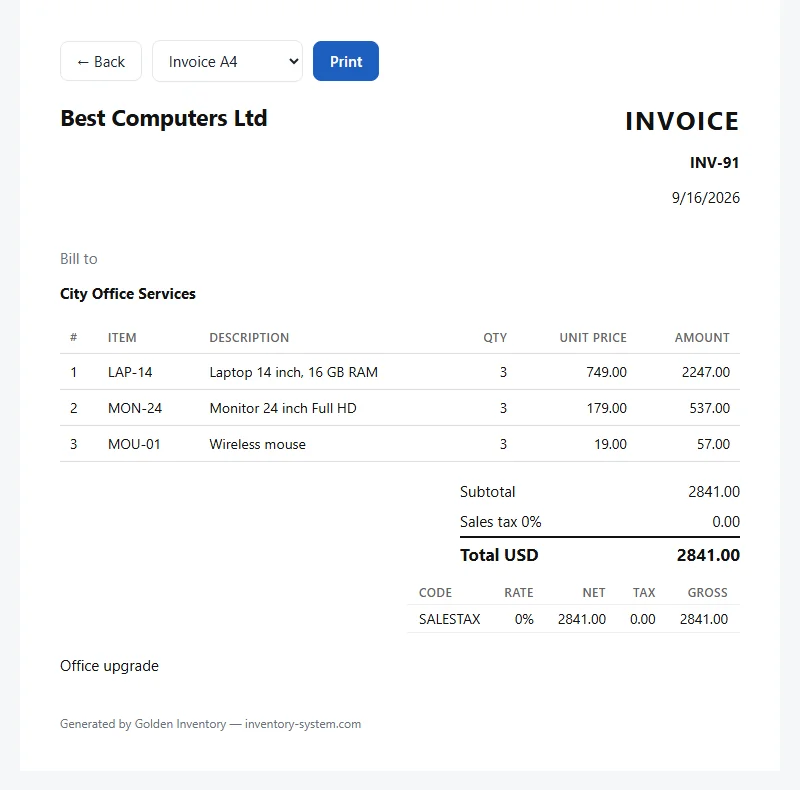
- Click Actions → Print, PDF or Email to send the invoice. Use Packing slip for the warehouse team.
11Record a customer payment
The customer pays the invoice. Record the money, so that you always know who owes you.
- Click Payments in, then + New.
- Select the Customer. The open invoices show below.
- Click full next to the invoice, or type the amount that was paid.
- Click = applied to copy the amount into Payment total.
- Type the Method, for example bank transfer or cash. Click Save.
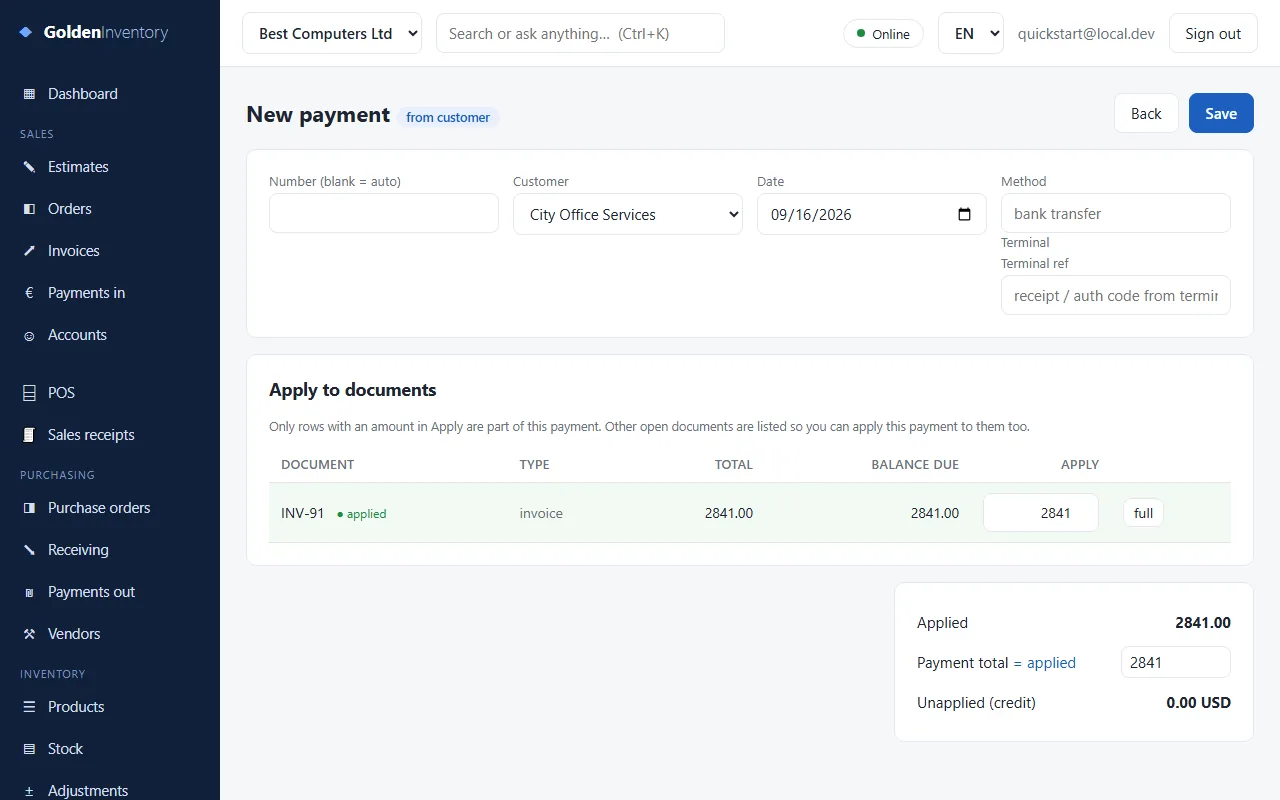
In the Invoices list, the Balance of the invoice is now 0.00. The Dashboard card Unpaid Invoices shows all money that customers still owe you. You pay your vendors in the same way in Payments out.
12Sell at the counter: POS and the Sales Receipt
Use the POS (point of sale) for a customer who pays immediately. The app makes the sales receipt for you.
- Click POS in the left menu.
- Tap an item tile, or scan the barcode. Tap again, or use + and −, to change the quantity.
- Select Cash or Card.
- For cash, type the amount that the customer gives you. The app shows the change.
- Click Charge.
- Click Print receipt if the customer wants one, then New sale.
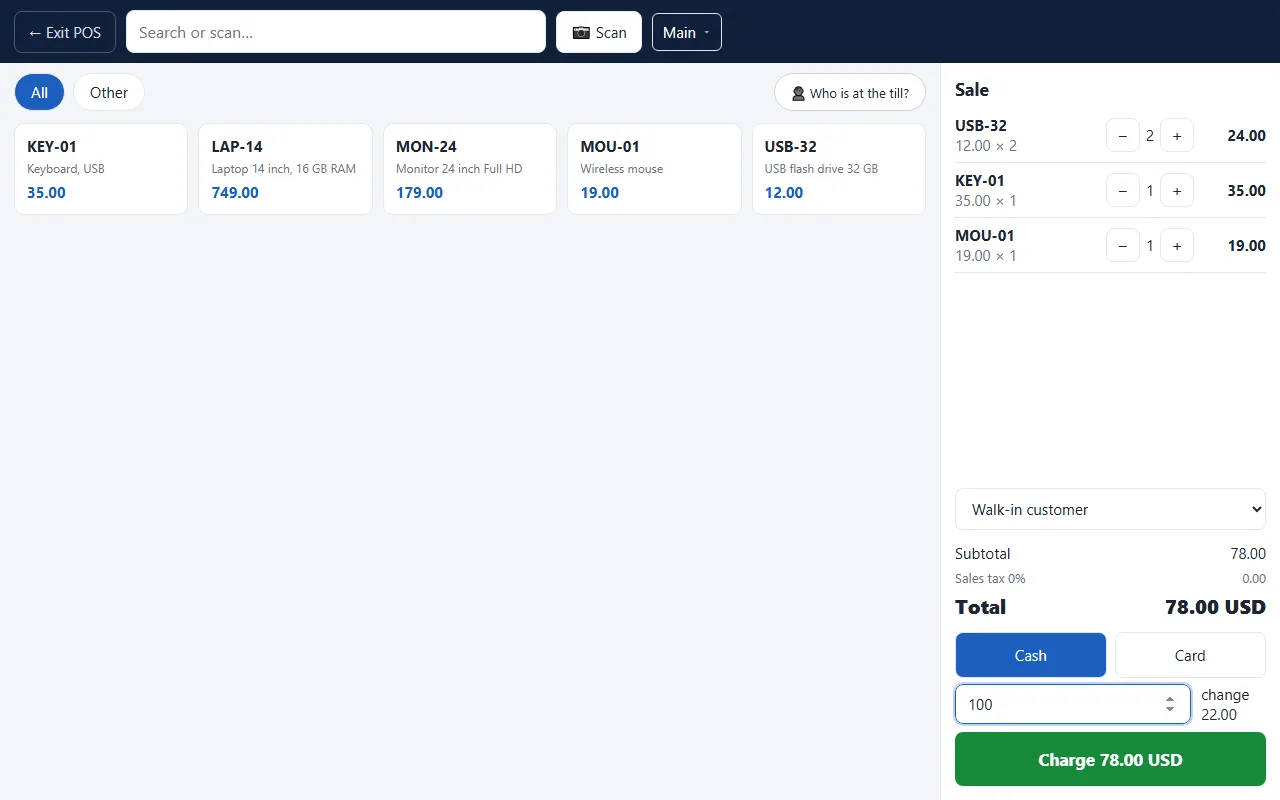
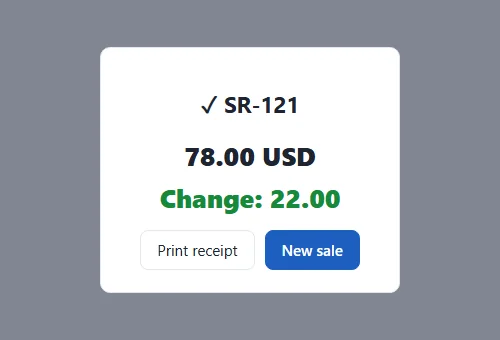
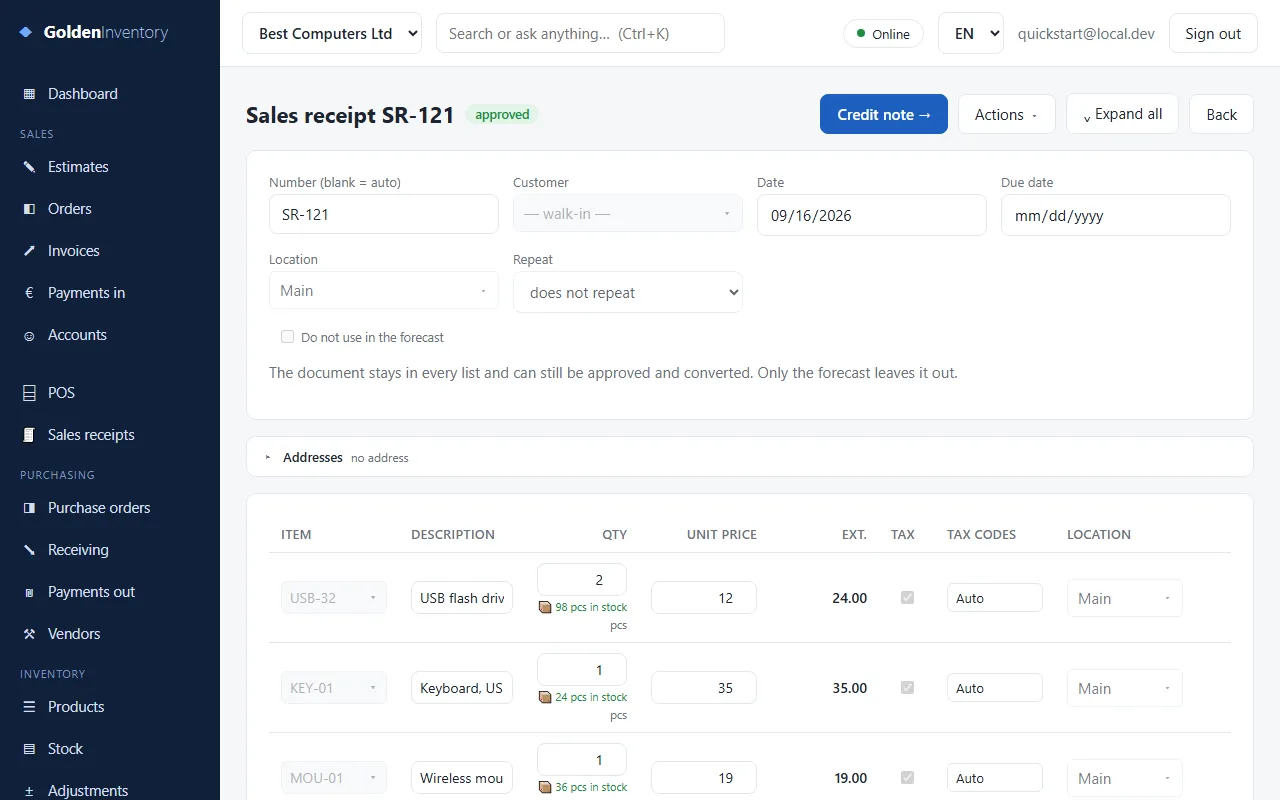
Each sale becomes an approved sales receipt. To find it later, click Sales receipts. For a return, open the receipt and click Credit note →.
13Check your stock
Click Stock to see what is on your shelves now.
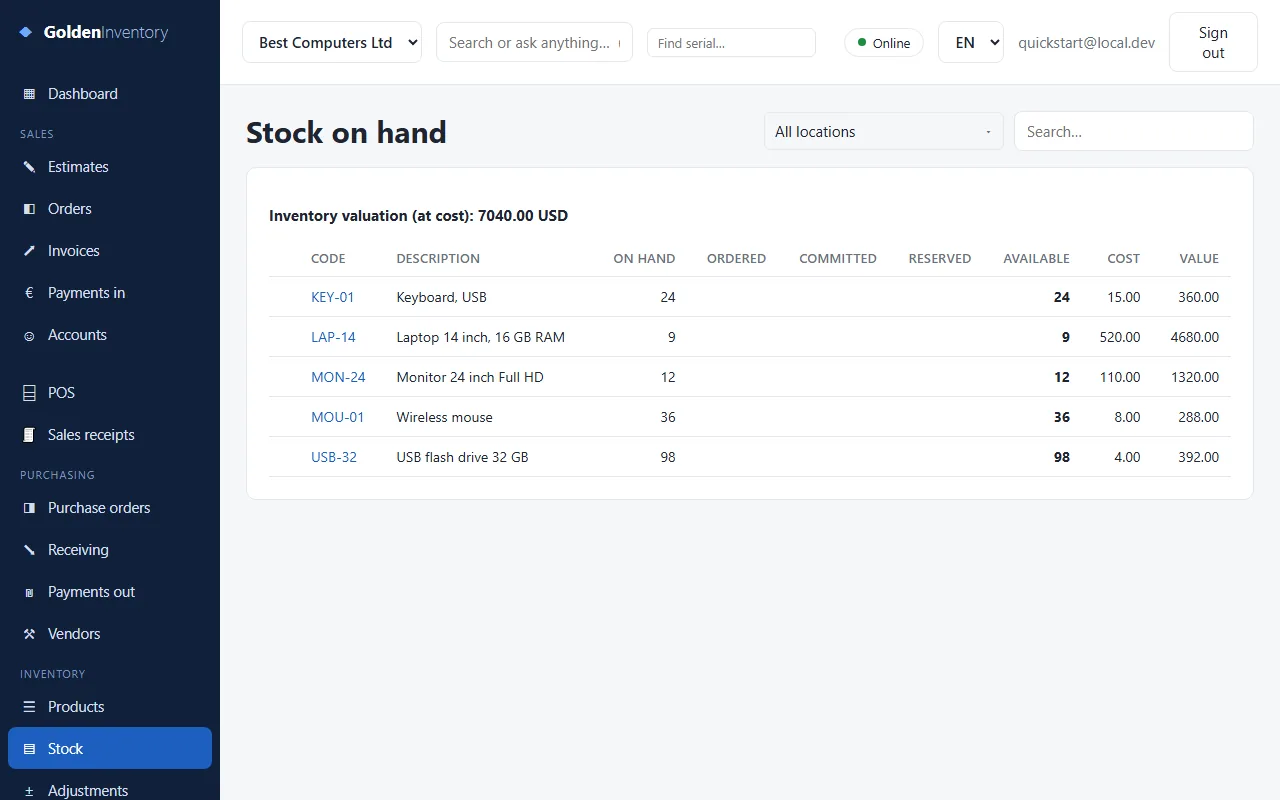
| Column | What it means |
|---|---|
| On hand | Quantity on the shelves. |
| Ordered | Quantity on open purchase orders. It is not here yet. |
| Committed | Quantity on open sales orders. It is not shipped yet. |
| Available | What you can still sell. |
| Value | On hand × cost. |
The count is different from the app?
- For one or two items, click Adjustments → + New. Add the item and the difference: a negative quantity removes stock, a positive quantity adds stock. Approve.
- For a full count, click Stock counts. Select the location and click Open the count. Count the shelves and type the counted quantities. Click Post. The app makes the adjustment for you.
More lists are in Reports: stock by location, inventory valuation, sales by item, sales by customer, unpaid invoices and more. Each report can be exported to CSV.
14Daily checklist and help
Every day
- Goods arrived? Open the PO → Receive → → count → Save & approve.
- Goods shipped? Open the sales order → Create invoice → → Save & approve → send the invoice.
- Money received? Payments in → apply it to the invoice.
- Counter sales? Use the POS for each sale.
- Look at Inventory to Reorder on the Dashboard. Order what is low.
Good rules
- Approve a document only when the action really happened: goods counted, goods shipped, money received.
- Do not delete approved documents. Use Cancel document (in Actions), a Credit note or a Vendor return. Then your history stays correct.
- Use a barcode scanner. It is faster, and it stops typing mistakes. A USB scanner works in every Scan barcode field. On a phone, click Scan with camera.
- Leave the Number field empty. The app gives the next number automatically.
Need help?
- In the app, type your question in the Search field at the top.
- Read the full built-in manual. It has a chapter for each function.
- See all guides on the Docs page.